
For this integration option you’ll be utilizing an Ontraport Order Form and a course in Summit Evergreen.
Overview
To connect Ontraport to Summit Evergreen, you will need to do the following:
- Set up a course in Summit Evergreen
- Configure Ontraport as your payment processor in Summit Evergreen
- Set up a product in Ontraport
- Set the thank-you page on your Ontraport Order Form
- Attach a “Ping URL” on your Ontraport Order Form
How Ontraport Integration Works
Each course needs to have a separate Sales Form within Ontraport, with the SKU field set to be the same SKU as the course in Summit Evergreen. The SKU of the product is passed to Summit Evergreen at purchase time, and this provides the glue between the two systems. Once the customer makes a successful purchase, they will be prompted to create a password and then get automatically logged into the Summit Evergreen course. When using Ontraport integration you will not utilize the “Offers” section in the Summit Evergreen tier details.
How to Integrate Ontraport Products/Order Forms and Summit Evergreen
Step 1: Create Your Product in Summit Evergreen and Note the SKU for the Product (You’ll Need This Later)
You can locate your course / tier SKU in Summit Evergreen as follows:
- In the left navigation menu, select “Structure”, then “Tiers”
- In the left pane, select the course tier for which you want to integrate with Ontraport
- This will bring up a page in the right pane that provides tier details
- In this page, in the “Tier Details” section, you will find the tier SKU
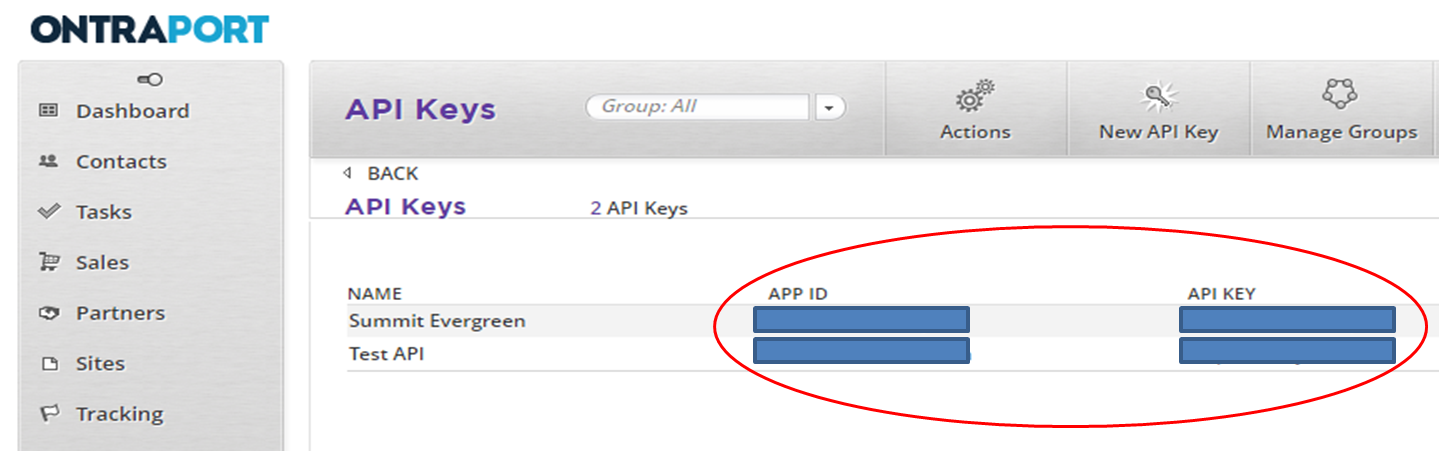
Step 2: Request Your API in Ontraport
- Login to your Ontraport account and select “Administration” from the dropdown menu in the upper right corner
- Select “Ontraport API Instructions and Key Manager”
- Add a new API key
Step 3: Set your Summit Evergreen Integration Settings
- In the left navigation menu, select “Settings”, then “Apps”
- In the left pane, select “Ontraport”
- This will bring up a page in the right pane that provides Ontraport integration details – in this page, in the “Authorization” section, enter your Ontraport App ID and API Key (see image above)
- Hit “Save” in the lower right corner
- In the left navigation menu, select “Structure”, then “Tiers”
- In the left pane, select the tier for which you want to integrate with Ontraport
- This will bring up a page in the right pane that provides tier details
- In this page, in the “Tier Details” section, in the “Payment Processor” dropdown box, select “Ontraport”
- Hit “Save” in the lower right corner


Step 4: Create your Product in Ontraport
- Create a Product in Ontraport by clicking on the “Sales” > “Product” menu item. Instructions on creating a product in Ontraport are here: https://support.ontraport.com/entries/23437781-Creating-Products
- Choose a price for your product
Step 5: Create your Order Form in Ontraport
- In Ontraport, go to “Contacts” > “Smart Forms” and create a sales form by following the instructions here: https://support.ontraport.com/entries/23727101-Creating-an-Order-Form
- Under “Opt In Settings,” choose “Single” and set the “Custom URL” to be the Summit Evergreen thank-you page for your domain http://EXAMPLE.COM/checkout/thankyou/
- Under “Conditional Rules”, click “Add Rule”
- Enter Name: “Summit Evergreen POST”
- Enter Ping URL: your Webhook URL from Summit Evergreen settings http://my.summitevergreen.com/purchases/webhook/WEBHOOK_KEY/payment/
- Enter Ping Data: api_key=API_KEY&app_id=APP_ID&sku=COURSE_SKU&email=[Email]&first_name=[First Name]&last_name=[Last Name]&customer_id=[Contact ID]&order_id=[Last Invoice #]&price=[Last Total Invoice Amount]
- Enter your API Key into the Ping Data above (this is your Ontraport API key)
- Enter your App Id into the Ping Data above (from Ontraport, but also displayed in Summit Evergreen settings)
- Enter your course SKU into the Ping Data above (from Summit Evergreen)
- Click “Save”
- Under “Advanced Settings” at the bottom of the page, be sure to check “Pass CGI variables to Landing/Thank you page”
- Click “Save”