The syllabus and the schedule are related but do not have to go hand-in-hand.
Users will be always be able to see the course structure provided by the syllabus, but they will not be able to access certain content until the schedule dictates they can.
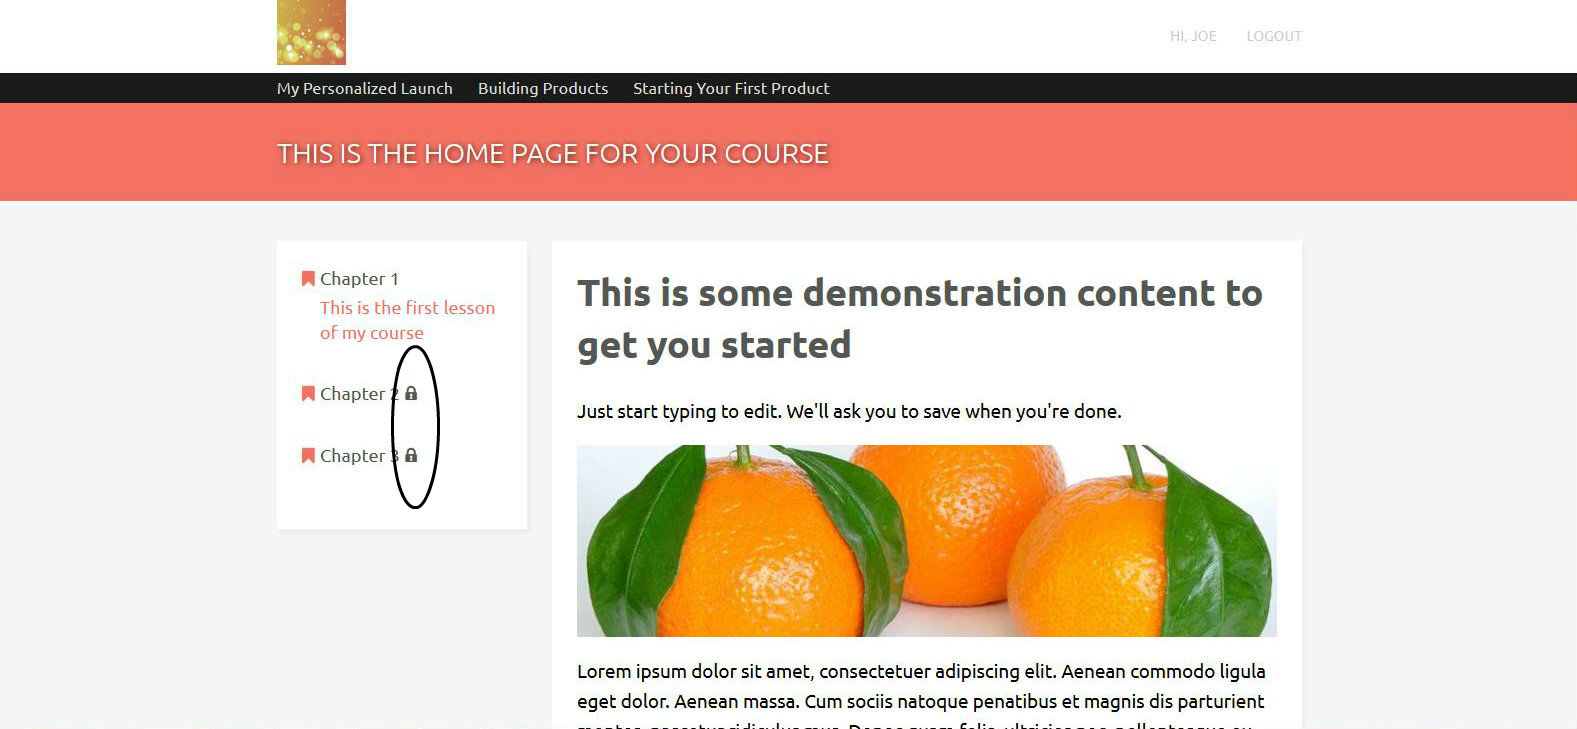
The example below shows what a new user would experience upon logging in to access their content. The user can see the entire syllabus, but only certain material can be accessed. Notice the lock icon next to the weeks that are not available.
Step 1: Access the Drip (Schedule) Menu
- In the left navigation menu, select “Structure”, then “Drip”.
Step 2: Set up Your Drip (Schedule)

- Select the “Unlock & Edit” button from the lower left corner to gain access to the schedule editor. You will need to select the button again, which will now say “Lock & Save”, to secure any changes to the schedule.
- You can toggle between the different course schedules by selecting one from the “Courses” dropdown menu, located to the immediate right of the word “Schedule”.
- When you access the schedule menu and it’s empty, there will be a large blue button that says “Set Up My Schedule.” By clicking the button, the schedule will automatically populate to match your syllabus. This action allows you to skip re-entering the syllabus.
- All of the pages assigned to the course will be listed under the “Always Available Pages” section until they are assigned to the schedule.
- Click on the days and times that are automatically populated to set the schedule. Note that everything is listed in days (i.e., 1 week = 7 days, 2 weeks = 14 days, etc.).
- Additional content can be added to the schedule by selecting the “New Lesson” or “Attach Existing Lesson/Email” button.
Step 3: Schedule Emails

Emails can be scheduled to go out as new content becomes available, or any time you want to send information to your customers.
- Locate the content on its scheduled day and select “New Email” button (note: this button is only available for scheduled content, not content in the “Always Available” section). You can also select “Attach Existing Lesson/Email” if you have already created the email.
- Type in the email subject line.
- Hit “Create Email”.
- If you want to schedule an email on a day that is not already on the schedule
- Click the “Actions” drop down menu (the white box to the far right of the word “Schedule”) and select “Add a New Interval”
- Select the day and time of the interval
- Select either “New Email” or “Attach Existing Lesson/Email”