Summit Evergreen offers some tools you can use to learn more about your students, improve your communications with them, and more effectively serve them. Through Summit Evergreen, you can accomplish these goals by setting up student surveys and quizzes.
Creating and Configuring Surveys / Quizzes
To set up student surveys / quizzes related to your course, do the following:
- In the left navigation menu, select “Content”, then “Surveys”
- In the left pane, in the action box to the right of the word “Surveys”, select “Add a Survey”
- This will bring up a box that allows you to create a new survey / quiz and give it a name

There are two ways to create a survey / quiz – as a standalone or as a followup to a course lesson:
Standalone Survey / Quiz:
- Leave the “Attach to Lesson” field blank
- This survey / quiz will then exist on its own separate page with its own unique URL – after creating the survey, you can get this URL as follows:
- In your survey / quiz, in the upper right corner menu, select “Actions”
- This will bring up a dropdown menu – in this menu, select “View Survey”
- This will bring up the page your survey / quiz is on, and at the top of the page you will see its URL

 Creating a Survey / Quiz That is a Followup to a Lesson:
- in the “Attach to Lesson” field dropdown box, choose the lesson the survey / quiz should be attached to – doing so will cause the survey / quiz to display directly under the lesson page content or in the sidebar, depending on the theme you choose (note: you can only add one survey / quiz at the bottom of a lesson)
- Hit “Save”
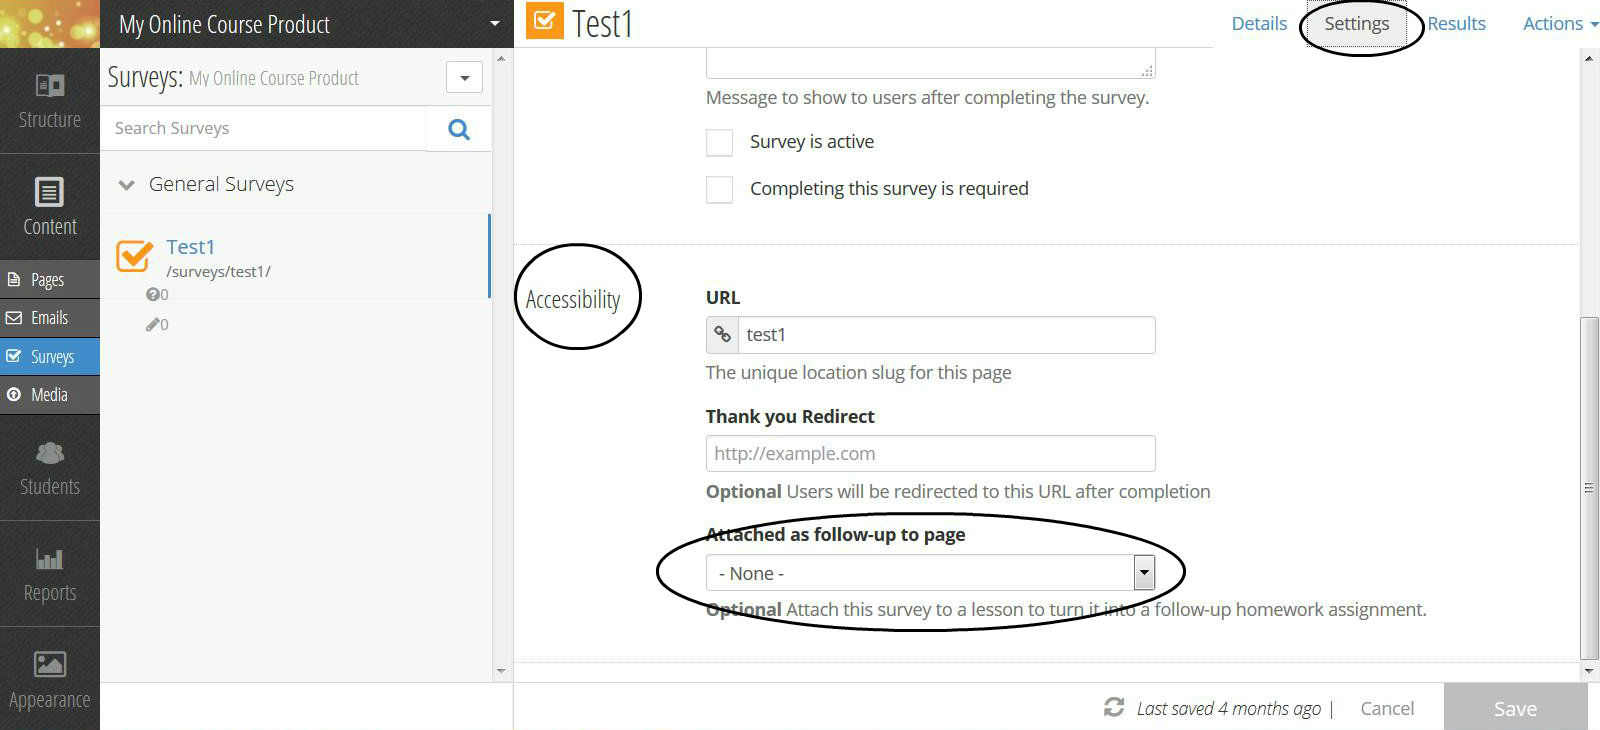
- If you create a standalone survey / quiz but later decide it should be a followup to a lesson (or vice versa), you can easily make this change as follows:
- In your survey / quiz, in the upper right corner menu, select “Settings”
- In this page, scroll down to “Accessibility”, and in the “Attached as follow-up to page” dropdown box, select the lesson the survey / quiz should be attached to (or, if changing the survey / quiz to be a standalone, choose “None” in this dropdown box)
- Hit “Save” in the lower right corner
Entering your Survey / Quiz Questions
- Once you’ve added your new survey / quiz, this will bring up an editing page in the right pane that lets you build your survey / quiz using a variety of component buttons
- Use these buttons to “drag and drop” content components into your survey / quiz
- If you want to delete a component (or even the word “Questions” that appears at the top of the survey / quiz as a default), just “drag and drop” it off the pane!

- From here you can add different types of questions by selecting the type you want from the left side “Add Components” boxes. After typing the question in a chosen box, select the “Apply” button. Select the “required” checkbox if the user has to answer the question before submitting (note: multiple choice and checkboxes are similar question types – the difference is that multiple choice requires one answer but checkboxes allow for numerous answers).
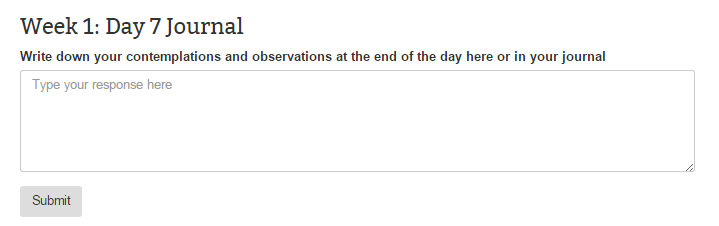
- You can also use your survey / quiz like a journal. In the survey / quiz, if you select the question type “long form text”, this will allow your students to use it as a journal. Here is an example of a survey / quiz being used as a journal:
- Once you’ve finished editing your survey / quiz, in the upper right corner menu, select “Settings” to customize elements like a thank-you message, URL, name, etc. – in this page, be sure to scroll down to “Accessibility” and check the “Survey is active” box, or else your survey / quiz will not go live!

Viewing your Survey / Quiz Results
- Once your product is live and the survey / quiz is available to your students, in the upper right corner menu, select “Results” to view the answers submitted to your survey / quiz – the results will show each user’s first and last name, the response, and the date and time submitted


- In your survey / quiz, in the upper right corner menu, if you select “Results”, this will give you the option to view your survey / quiz results, and the option to download to a CSV file
- Note: When setting up your survey / quiz, it cannot be done as a public page – i.e., only logged in users can take surveys / quizzes
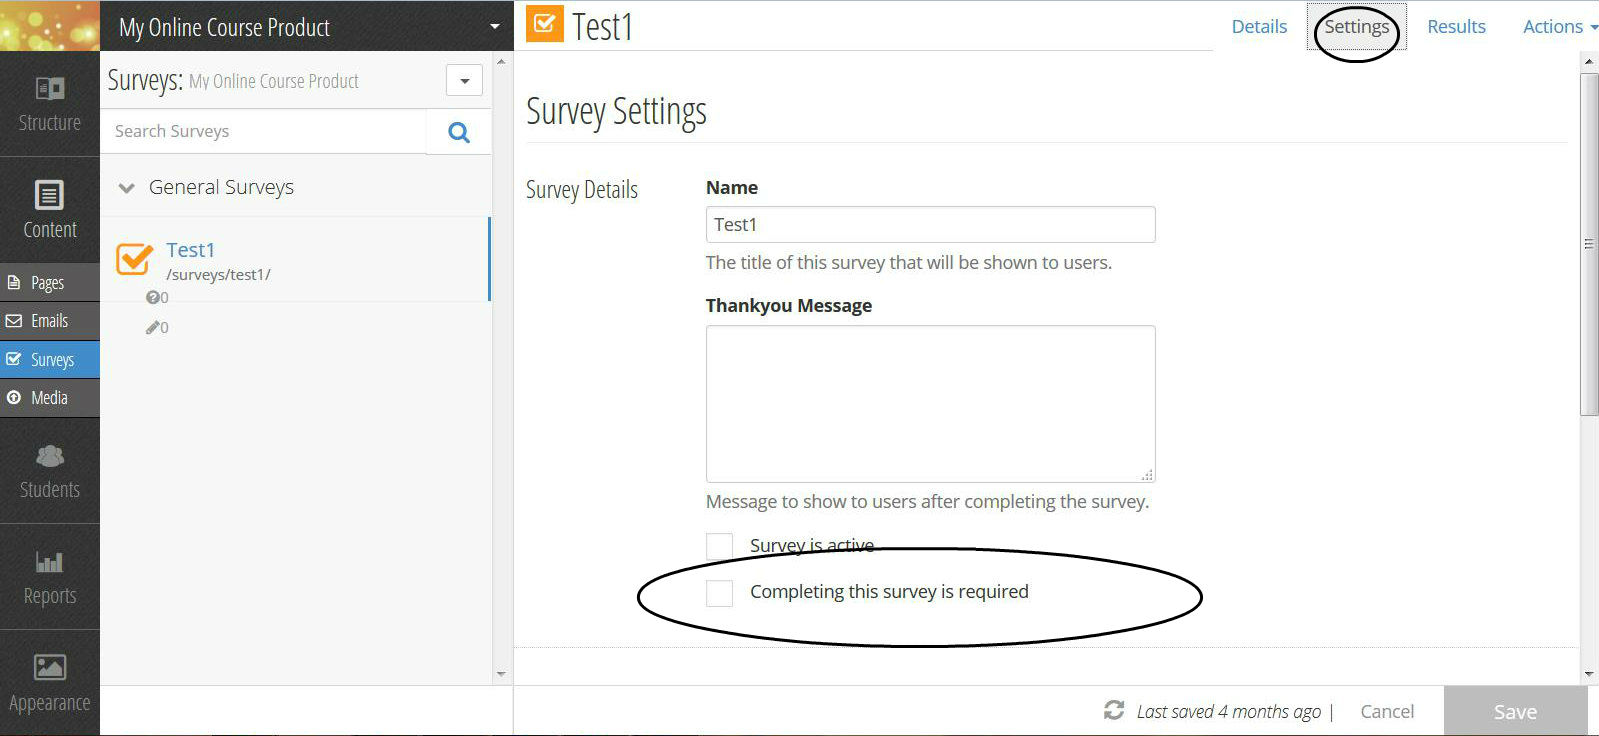
Requiring Students to Complete a Survey / Quiz
- In the “Settings” page, one of your options is to require that your survey / quiz be completed – you may want to do this to ensure that a student takes a survey / quiz before moving on to the next section in your syllabus, and you may even want the student to achieve a minimum score in the survey / quiz as well. To set up this requirement, do the following:
- In the “Settings” page, scroll down to “Accessibility”, check the “Completing this survey is required” box, and enter any minimum score required (if applicable) in the “Passing Score” box that will appear (note: although the score appears as a number, it actually indicates the percentage of questions that must be correct)
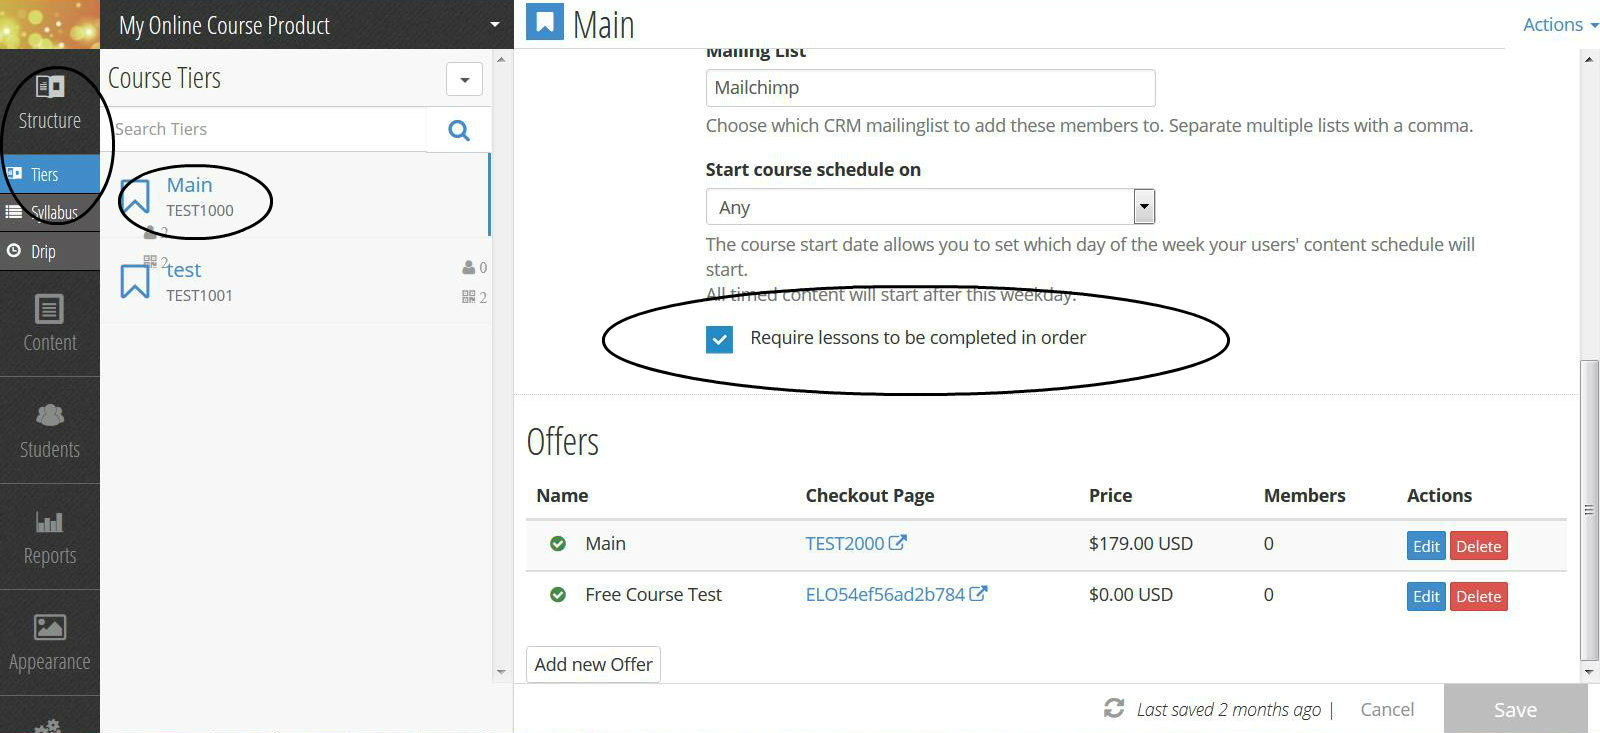
- In the left navigation menu, select “Structure”, then “Tiers”
- In the left pane, select the product tier for which you’d like to require survey / quiz completion
- In the right pane, this will bring up tier details and a list of the current products / courses for this tier
- In the “Tier Details” section, check the “Require lessons to be completed in order” box
- Hit “Save” in the lower right corner
- If you choose the option to require that your survey / quiz be completed, as an alternative to or in addition to setting a minimum score, you can specify correct answers that must be received. To specify these correct answers, do the following:
- In the quiz “Details” page, after you add a component, click on the text of the question – this will bring up a box that will let you enter your question text, your possible answer choices, and the correct answer you wish to see
- Complete the text, possible answer choices, and correct answers, then hit “Save”
- When using this requirement feature, there are a number of points to consider:
- With the requirement feature, it can either be “turned on” for everything, or “turned off” for everything. So for a quiz, you would specify that every answer is correct and that the passing score is 100%. Then, the only way a user wouldn’t move forward is if he/she didn’t answer a question. For a survey, you would specify that every answer is correct and that the passing score is 0%. Then, a user can move forward after submitting, regardless of whether his / her answers are correct.
- When the requirement feature is in place, it prohibits a user from moving to the next syllabus section. However, it doesn’t prohibit a user from moving to the next lesson within one syllabus section.
- You can have one document serve as both a quiz and a survey by including both types of questions. But keep in mind that this approach limits your ability to monitor the activity and results involved, since the requirement / correct answer features get used differently for quizzes than they do for surveys. In order to include both a quiz and a survey in one document, you’ll need to choose between monitoring the quiz section or monitoring the survey section. An alternative to this approach would be to have a quiz at the end of a lesson and then a standalone survey that corresponds to it, or vice versa. Then you could have different monitoring features for both, since they’d be separate documents.
- If you wish to test, if you “view member site” as the administrator of your account, the locking feature doesn’t work. To view and test how it actually works for a user, you would need to create a new user, add the product for them, and then login as that user.