What Are Tiers? Why Use Them?
When creating your product in Summit Evergreen, one of the important elements you’ll want to consider is the tier structure you will use to build out product offerings. Using tiers means that your product will contain various options that are available at different price points. Tiered pricing for your product offers the following advantages:
- You can make more money by widening your potential customer base, providing different options for different types of customers.
- You can provide a lower starting cost gateway for new customers who may eventually graduate to higher-priced products.
- You can increase efficiency – it’s easier to create one product with multiple price points than many separate products.
- You can keep your customers focused on your product and not your competitor’s, because they can choose various options within your product.
- You can provide customers with a sense of value, because they can choose what they want at a price they prefer.
In order to create tiers for your product, here are some possible variables that you can use to provide options:
- Quantity: Give your customers more of your product.
- Quality: Give your customers something that’s just plain better.
- Perceived Quality: In certain cases, you can offer a product that appears better even though there isn’t anything quantifiably different about it.
- Service: Often, customers are willing to pay for a higher level of personal assistance.
- Duration: You can offer a longer experience.
- Commitment Level: You can offer varying levels of commitment based on factors such as amount used, frequency of use, etc.
- Experience: You can create premium experiences for certain higher-paying customers.
- Customization: You can allow your customers to “pay to personalize” by adding / subtracting features, customizing features, etc.
- Speed: You can offer elements such as “quick start guides” or other onboarding materials for customers who need to get up and running quickly.
- Professional Level: You can offer a business-grade product and open yourself up to a new echelon of customers.
When creating tiers for your product, you’ll want to give careful consideration to the names you assign. For instance, your tier names should be specific enough to reflect the various offerings (e.g., names like Level 1, Level 2 are not advisable), but not be so “over the top” (e.g., Super Cool Product Level) or overly descriptive that it detracts from selling that tier to a potential customer. Some optimal words to use in your tier names are as follows:
- Lower-priced end of the product spectrum: Introductory, Starter, Express, Beginner, Economy, Individual
- Middle of the product spectrum: Basic, Standard, Classic, Silver / Gold, Preferred, Small Business
- Top levels of the product spectrum: Plus, Expert, Premier, Corporate, Professional / Pro, Master, Premium, Enterprise, Ultimate, Platinum
Example of tiered pricing:

Want more info on tiered pricing, check out our blog articles about this subject:
https://summitevergreen.com/why-tiered-pricing-is-…
https://summitevergreen.com/expand-your-audience-w…
Setting Up Product Tiers in Summit Evergreen
To set up tiers for your product in Summit Evergreen, do the following:
- Select the product from the product dropdown menu in the upper left corner
- In the left navigation menu, select “Structure”, then “Tiers”
- In the left pane, you will see a list of the current tiers for your product. If you have not yet created tiers, there will be just one tier that says “Main”, which was set up by default when you created your product
- To add a new tier, in the upper right corner of the left pane, click the dropdown box and select “Add a Tier”

- This will bring up a box that says “Create New Member Tier” – enter your information in the fields and then hit “Save”
- Note: In this box is a “Copy Tier” field – if you would like to copy in the content from another tier to use as a template for your new tier, simply enter then name of the tier to be copied into this field, and then your new tier will be created as an exact copy of the other tier, complete with its syllabus and drip

Managing your Course Content by Tier
Editing the Syllabus
- In the left navigation menu, select “Structure”, then “Syllabus”
- At the top of the left pane, to the immediate right of the word “Syllabus”, click on the dropdown box to toggle between the different tiers within your product and access their individual syllabus
- In the lower left corner, you will see a lock icon – click on it to unlock editing capability and edit your syllabus. (need help editing your syllabus? click here for more documentation)

Creating New Pages of Content
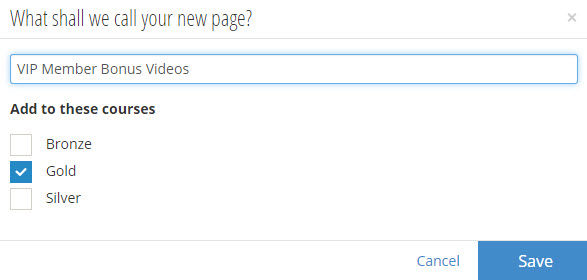
- If you have not yet created the content page you want to use, select the “New Lesson” button to create your content and then add it
- The new page pop-up box will appear, and from here you can select which tiers will have access to this page. (Note: after creating the page, remember to add it to each tier’s applicable syllabus )
- Tiers will share some pages of content – this means when you need to make an edit to a page, it only needs to be done once, instead of having to do it multiple times for each individual tier
- Now you can edit your page as usual (need help editing your pages of content? click here)
Editing a Page’s Access with Different Tiers
- If you have a page of content, and you want to add it to a tier or remove it from a tier, select the “Actions” dropdown from the content editor menu
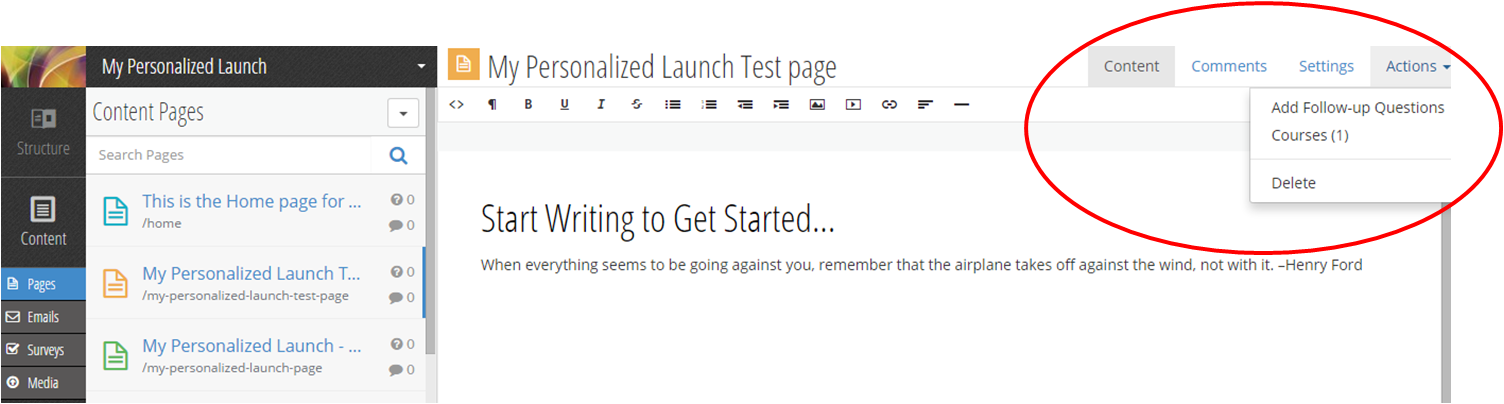
- Select “Courses”, and a pop-up will appear where you can modify which tiers have access to the page of content
